唧唧复唧唧,鸡鸡生小鸡
🤷🏻♂️ 要是因为开小鸡导致 Oracle Cloud 账号被封,可不能怪博主提供的文章啊。
下面介绍如何通过安装 PVE7 来使 Oracle ARM VPS 开 LXC 小鸡,建议资源拉满,直接上 4C24G200G。为避免安装过程出错,最好不分配 IPV6 地址。
1/ 首先网络重装 ARM 鸡至 Debian 11:
# 建议修改下方 “#3Y!fxLXt9N6*GWo” 密码
bash <(wget --no-check-certificate -qO- 'https://raw.githubusercontent.com/MoeClub/Note/master/InstallNET.sh') -d 11 -v 64 -p "#3Y!fxLXt9N6*GWo"
2/ 安装依赖
apt update
apt install vim git curl wget python3-dev python3-setuptools bison flex autoconf libtool swig gettext gnupg screen -y
3/ 编辑 hosts
编辑 /etc/hosts,只保留以下两行
127.0.0.1 localhost
公网IP 主机名.proxmox.com 主机名
# 例如 139.185.25.0 debian.proxmox.com debian
# 公网IP 可以通过 curl ip.sb 查看
4/ 修改安装源
rm /etc/apt/sources.list.d/*.list
cp /etc/apt/sources.list /etc/apt/sources.list.old
rm /etc/apt/sources.list
echo "# Raspberry Pi Bullseye Repoo
deb http://archive.raspberrypi.org/debian/ bullseye main

# Pimox7 Repo
deb https://raw.githubusercontent.com/pimox/pimox7/master/ dev/

# Debian Rep0
deb http://deb.debian.org/debian bullseye main contrib non-free

# Security Updated
deb http://security.debian.org/debian-security bullseye-security main contrib non-free" > /etc/apt/sources.list
curl https://raw.githubusercontent.com/pimox/pimox7/master/KEY.gpg | apt-key add -
curl http://archive.raspberrypi.org/debian/raspberrypi.gpg.key | apt-key add -
screen
# 为避免网络中断导致安装失败,这里使用 screen,回车即可
apt update
apt install proxmox-ve -y
安装中途会有弹窗,默认选项即可,期间 VPS 会断开连接,稍等几分钟即可安装完毕,浏览器输入 https://ip:8006 打开 PVE 后台面板。
5/ 重新编译安装 AppArmor
git clone https://gitlab.com/apparmor/apparmor.git
cd apparmor

export PYTHONPATH=$(realpath libraries/libapparmor/swig/python)
export PYTHON=/usr/bin/python3
export PYTHON_VERSION=3
export PYTHON_VERSIONS=python3

cd ./libraries/libapparmor
./autogen.sh
./configure --prefix=/usr --with-perl --with-python
make
make install

cd ../../binutils/
make
make install

cd ../parser/
make
make install

cd ../utils/
make
make install
6/ 配置虚拟 Bridge 网卡
在 /etc/network/interfaces 文件最下方新增以下内容
auto vmbr0
#private sub network
iface vmbr0 inet static
	address 10.10.10.1/24
	bridge-ports none
	bridge-stp off
	bridge-fd 0

	post-up echo 1 > /proc/sys/net/ipv4/ip_forward
	post-up iptables -t nat -A POSTROUTING -s '10.10.10.0/24' -o enp0s3 -j MASQUERADE
	post-down iptables -t nat -D POSTROUTING -s '10.10.10.0/24' -o enp0s3 -j MASQUERADE

# enp0s3 是甲骨文 Arm 鸡默认网卡名称,若有变动相应更改
/etc/init.d/networking restart 重启网络,更新配置。
7/ 下载小鸡镜像
由于适用于 Arm 的系统镜像较少, PVE 自带模板也不支持 Arm,可以在下方地址找到一些系统的镜像:
PVE LXC 镜像存放于 /var/lib/vz/template/cache
# 下载 debian
wget -O "/var/lib/vz/template/cache/debian-bullseye.tar.xz" https://images.linuxcontainers.org/images/debian/bullseye/arm64/cloud/20240317_05%3A24/rootfs.tar.xz

# 下载 ubuntu
wget -O "/var/lib/vz/template/cache/ubuntu-focal.tar.xz" https://images.linuxcontainers.org/images/ubuntu/focal/arm64/cloud/20240317_08%3A11/rootfs.tar.xz

# 下载 rockylinux
wget -O "/var/lib/vz/template/cache/rockylinux-8.tar.xz" https://images.linuxcontainers.org/images/rockylinux/8/arm64/cloud/20240318_02%3A06/rootfs.tar.xz

# 下载 alpine
wget -O "/var/lib/vz/template/cache/alpine-3-19.tar.xz" https://images.linuxcontainers.org/images/alpine/3.19/arm64/cloud/20240317_13%3A00/rootfs.tar.xz

# 以上镜像博主未测试能否开机,请自行探索。
8/ 开小鸡
登录 PVE 后台,在右上角点击 创建CT
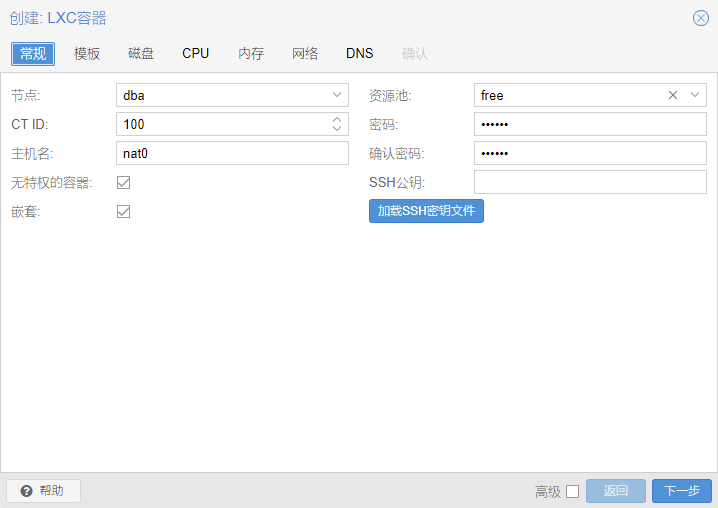
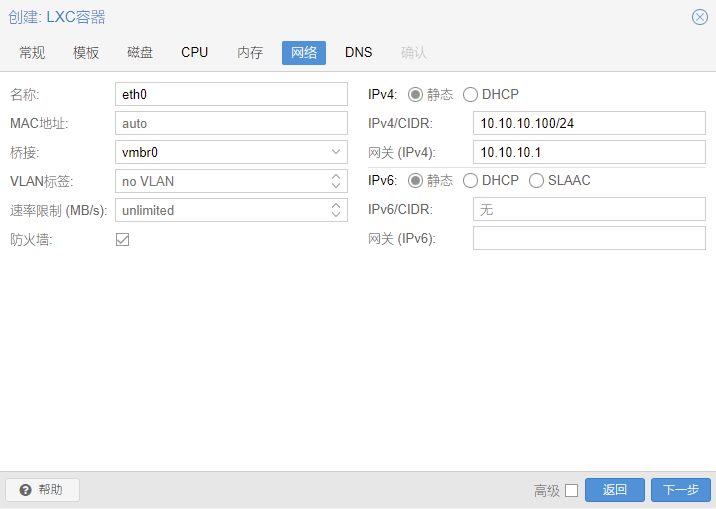
输入 root 用户密码 - 选择系统镜像 - 磁盘、CPU、内存按需填写,网络部分按下方填写:
- 桥接:选择
vmbr0 - IPV4:
10.10.10.100/24(建议内网 IP 最后一位与 CT ID 一致,这里必须有一个 /24,虽然没卵用) - 网关:
10.10.10.1
然后点击创建即可。
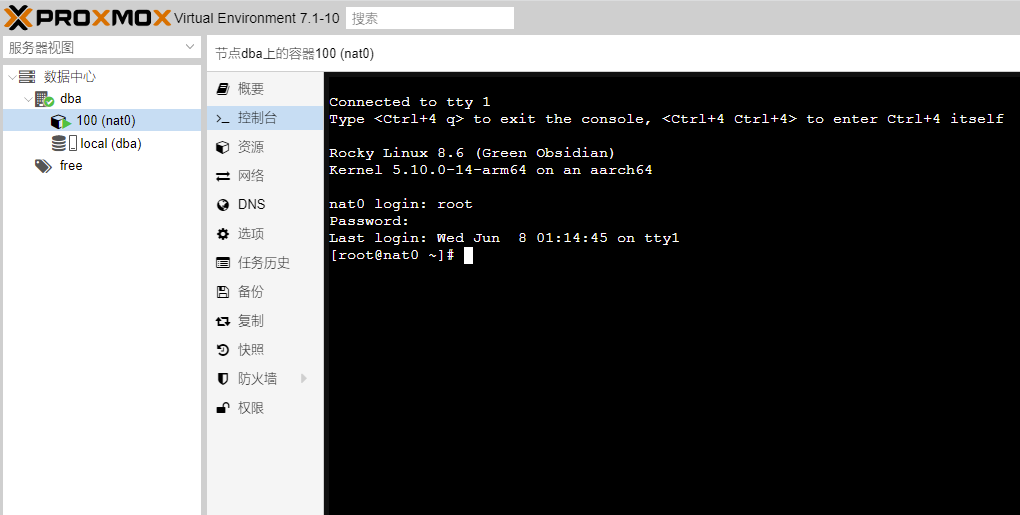
9/ 配置小鸡
由于这些镜像均为纯净版镜像,纯净到连 SSH 都没内置,首先将小鸡开机,并进入控制台,使用设置的 root 密码登录:
更新系统,并安装 openssh
# centos-based system, like rockylinux,almalinux
yum update
yum -y install openssh-server
systemctl restart sshd

# debian-based system, like ubuntu
apt update
apt -y install openssh-server
systemctl restart sshd

# alpine
apk update
apk add openssh-server
/etc/init.d/sshd restart
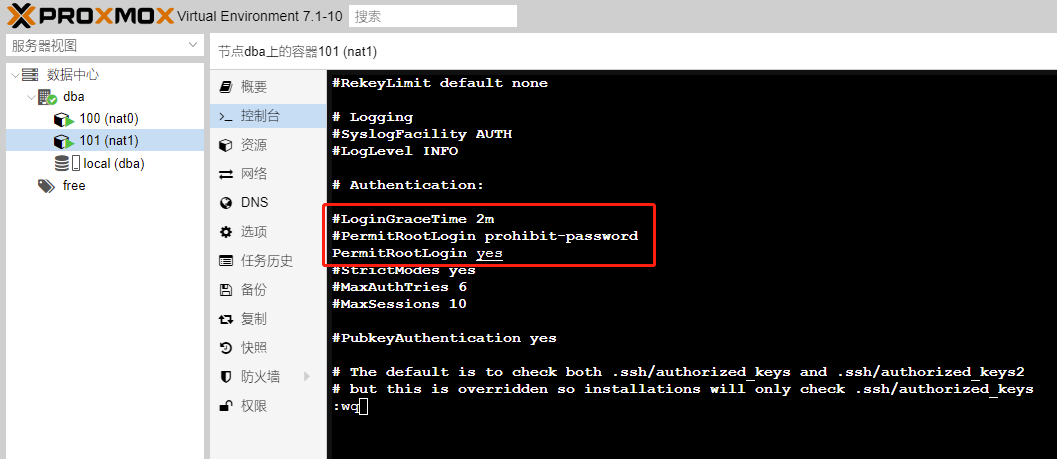
编辑 /etc/ssh/sshd_config 文件中 PermitRootLogin 行,去掉前面的 # 并将后面改成 yes,并重启 sshd。
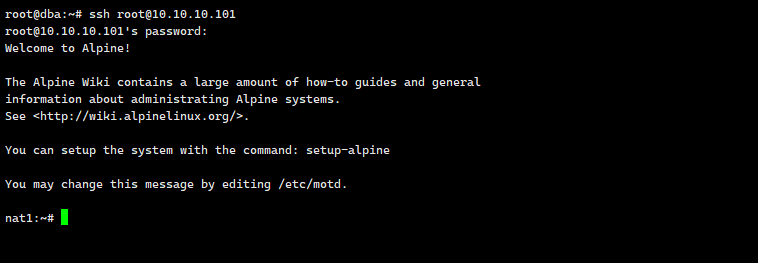
切换到母鸡终端,尝试用 ssh root@10.10.10.100 进行登录,能成功登上去就 OK 了
10/ 配置端口转发
将以下代码保存至母鸡 nat.sh
# 使用方法: bash nat.sh $(lxc-ls)

# 小鸡的端口转发规则 ssh 22 http 80 10<N>00:10<N>20
# ID 对应 IP 101: 10122 10180 10100:10120
#-------------------------------------------------------------#
input_id()
{
id=101
echo -e "测试默认 ID: \033[41;37m ${id} \033[0m 可以修改设置其他 ID; "
read -p "请输入 NAT 小鸡的 ID 号(按回车不修改): " -t 30 new
if [[ ! -z "${new}" ]]; then
id="${new}"
fi
nat_port
iptables -t nat -nvL PREROUTING
echo -e ":: PVE NAT 批量端口转发设置脚本: \033[41;37m bash nat.sh $(lxc-ls) \033[0m \n 使用参考: https://262235.xyz/index.php/archives/714/"
}
# 以 id 为 ip 设置端口转发
nat_port()
{
iptables -t nat -I PREROUTING -p tcp -m tcp --dport ${id}22 -j DNAT --to-destination 10.10.10.${id}:22
iptables -t nat -I PREROUTING -p tcp -m tcp --dport ${id}80 -j DNAT --to-destination 10.10.10.${id}:80
iptables -t nat -A PREROUTING -p tcp -m multiport --dport ${id}00:${id}20 -j DNAT --to-destination 10.10.10.${id}
}

# 手工输入 id,input_id 调用 nat 端口转发
if [ $# -eq 0 ];
then
input_id
exit
fi

# 遍历参数 批量设置 nat 端口转发
for arg in $*
do
id=$arg
nat_port
done

# 查看 nat PREROUTING 端口映射规则
iptables -t nat -nvL PREROUTING

# 清空 nat PREROUTING 端口映射规则
# iptables -t nat -F PREROUTING
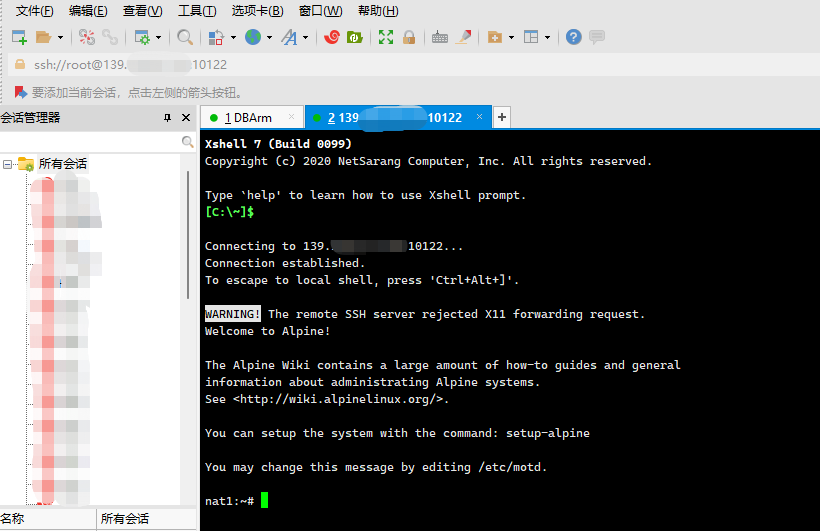
通过 bash nat.sh $(lxc-ls) 可为所有小鸡配置端口转发,例如小鸡 ID 为 101:
- 公网IP:10122 转发至小鸡 22 端口
- 公网IP:10180 转发至小鸡 80 端口
- 公网IP:10101~10120 转发至小鸡 10101~10120 端口
现在测试通过本地终端访问 公网IP:10122 是否能连接:
—