使用 Cloudflare 官方 warp-cli
2023-12-12 更新
Warp-cli 是 Cloudflare 官方提供的 Warp 客户端,刚推出时暂不支持 ipv6 单栈鸡,现在已经可以在 ipv6 鸡上正常使用了。
Ubuntu 安装
支持的发行版为:
- Jammy (22.04)
- Focal (20.04)
- Bionic (18.04)
- Xenial (16.04)
# Install lsb
sudo apt update && sudo apt install lsb-release gpg curl wget

# Add cloudflare gpg key
curl -fsSL https://pkg.cloudflareclient.com/pubkey.gpg | sudo gpg --yes --dearmor --output /usr/share/keyrings/cloudflare-warp-archive-keyring.gpg

# Add this repo to your apt repositories
echo "deb [arch=amd64 signed-by=/usr/share/keyrings/cloudflare-warp-archive-keyring.gpg] https://pkg.cloudflareclient.com/ $(lsb_release -cs) main" | sudo tee /etc/apt/sources.list.d/cloudflare-client.list

# Install
sudo apt update && sudo apt install cloudflare-warp
Debian 安装
支持的发行版为:
- Bookworm (12)
- Bullseye (11)
- Buster (10)
- Stretch (9)
# Install lsb
apt update && apt install lsb-release gpg curl wget

# Add cloudflare gpg key
curl -fsSL https://pkg.cloudflareclient.com/pubkey.gpg | gpg --yes --dearmor --output /usr/share/keyrings/cloudflare-warp-archive-keyring.gpg

# Add this repo to your apt repositories
echo "deb [arch=amd64 signed-by=/usr/share/keyrings/cloudflare-warp-archive-keyring.gpg] https://pkg.cloudflareclient.com/ $(lsb_release -cs) main" | tee /etc/apt/sources.list.d/cloudflare-client.list

# Install
apt update && apt install cloudflare-warp
CentOS 8 安装
# Add cloudflare-warp.repo to /etc/yum.repos.d/
curl -fsSl https://pkg.cloudflareclient.com/cloudflare-warp-ascii.repo | tee /etc/yum.repos.d/cloudflare-warp.repo

# Update repo
yum update

# Install
yum install cloudflare-warp
Warp-cli 使用
注册warp免费账号
warp-cli register
输入 y 回车同意 TOS,出现 success 即成功
添加排除路由
# ipv6-only VPS
warp-cli add-excluded-route ::0/0

# ipv4-only VPS
warp-cli add-excluded-route 0.0.0.0/0
连接 warp
warp-cli set-mode warp
warp-cli connect
测试连接
# ipv6-only VPS
curl -4 ip.sb
# 有 ipv4 代表启动成功

# ipv4-only VPS
curl -6 ip.sb
# 有 ipv6 代表启动成功
设置自动连接
warp-cli enable-always-on
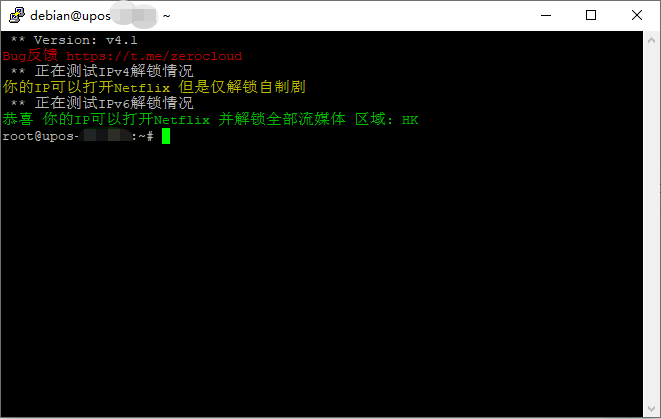
部分便宜/免费 VPS 只提供 IPv6 地址,搭建魔法工具后是无法访问大多数只提供 IPv4 地址的网站(例如 Github),我们可以通过 Cloudflare Warp 提供的 Wireguard 隧道来变相打通 v6 to v4。也可以为 IPv4 Only VPS 加上 IPv6 支持,目前(截至发布日)Warp 提供的 IPv6 地址能解锁 Netflix。
一键包
# 为 VPS 配置 IPv4 环境,用于 IPv6-Only VPS
bash <(curl -fsSL git.io/warp.sh) wg4
# 为 VPS 配置 IPv6 环境,用于 IPv4-Only VPS
bash <(curl -fsSL git.io/warp.sh) wg6
手动搭建
本方式基于 Debian 10 Buster 并且使用 root 用户。
0 准备工作
安装必要软件
apt update && apt install wget vim lsb-release -y
1 获取 Warp 配置文件
通过 wgcf 工具获取 Warp 配置文件:
wget -O wgcf https://github.com/ViRb3/wgcf/releases/download/v2.2.2/wgcf_2.2.2_linux_amd64 && chmod +x wgcf
注册账号
./wgcf register
获取配置文件
./wgcf generate
(如果提示 429 Too many requests 错误,多 gen 几次)
即会在在当前目录生成 wgcf-profile.conf 文件,根据 VPS 实际情况编辑此文件
vim wgcf-profile.conf
按 i 开始编辑文件
IPV6 Only VPS
删除 AllowedIPs = ::/0 行,仅保留 AllowedIPs = 0.0.0.0/0
最后一行 Endpoint 改为 [2606:4700:d0::a29f:c001]:2408
IPV4 Only VPS
删除 AllowedIPs = 0.0.0.0/0 行,仅保留 AllowedIPs = ::/0
最后一行 Endpoint 改为 162.159.192.1:2408

按 Esc 键,并输入 :wq 保存文件,将此文件复制到 Wireguard 配置文件夹
mkdir /etc/wireguard && cp wgcf-profile.conf /etc/wireguard/wgcf.conf
2 安装 Wireguard
添加 backports 源
echo "deb http://ftp.debian.org/debian buster-backports main" >> /etc/apt/sources.list
安装最新内核
apt install -t $(lsb_release -sc)-backports linux-image-$(dpkg --print-architecture) linux-headers-$(dpkg --print-architecture) --install-recommends -y
安装 Wireguard
apt install wireguard openresolv -y
将 Wireguard 设置成开机启动
systemctl enable wg-quick@wgcf
重启 VPS
reboot
重启后可通过命令 wg 检查启动是否成功。

完毕。
本文参考了 原文 及其评论。